


Hey there! As a supplier of commercial cold storage rooms, I've been involved in numerous installation projects. I'm stoked to share the installation steps with you. Whether you're running a small business or a large enterprise, understanding these steps can help you make the most of your investment.
Step 1: Site Preparation
The first thing you gotta do is pick the right spot for your cold storage room. You need a flat, stable surface that can handle the weight of the cold room and its contents. Make sure the area is well - ventilated, too, because the refrigeration system needs fresh air to work efficiently.
Measure the space carefully. You want to ensure there's enough room for the cold storage room and also some extra space around it for maintenance and access. Check for any potential obstacles like pipes, wires, or columns that could get in the way during installation.
If the floor isn't level, you might need to level it. This can involve using shims or pouring a new concrete slab. It's super important because an uneven floor can cause stress on the cold room panels and lead to leaks or structural issues down the road.
Step 2: Panel Assembly
Once the site is ready, it's time to start assembling the panels. We usually provide high - quality panels that are easy to install. These panels are designed to fit together like puzzle pieces.
Start with the corner panels. Make sure they're perfectly vertical and square. You can use a level to double - check. Then, connect the side panels to the corner panels. Most of our panels come with a tongue - and - groove system that makes the connection tight and secure.
Use the appropriate fasteners to hold the panels in place. These fasteners are designed to be strong and durable, ensuring the integrity of the cold storage room. As you assemble the panels, be careful not to damage them. Any scratches or dents could affect the insulation properties.
Step 3: Door Installation
The door is a crucial part of the cold storage room. It needs to seal tightly to prevent cold air from escaping. First, select the right location for the door. It should be easily accessible but also in a place that won't interfere with the overall operation of the cold room.
Install the door frame according to the manufacturer's instructions. Make sure it's level and plumb. Then, hang the door on the frame. Adjust the hinges so that the door opens and closes smoothly. Test the door seal to ensure there are no gaps. You can use a piece of paper to check; if you can't pull the paper out when the door is closed, the seal is good.
Step 4: Refrigeration System Installation
The refrigeration system is the heart of the cold storage room. There are different types of refrigeration systems available, but we often recommend our Cold Storage Room with Refrigeration System.
First, position the compressor unit outside the cold storage room. It should be in a well - ventilated area away from direct sunlight and heat sources. Connect the refrigerant lines from the compressor to the evaporator unit inside the cold room. Make sure the connections are tight and leak - free.
Install the evaporator unit inside the cold room. It should be mounted at the right height and angle for optimal air circulation. Connect the electrical wiring for both the compressor and the evaporator. Follow all the safety guidelines and local electrical codes during this process.
Step 5: Insulation and Sealing
Proper insulation is key to keeping the cold air inside the room and reducing energy consumption. After the panels are assembled, check for any gaps or joints that need additional insulation. You can use insulation foam or tape to seal these areas.
Seal all the penetrations in the panels, such as where the refrigerant lines or electrical wires pass through. This helps prevent air leakage and moisture infiltration. Pay special attention to the door seals and make sure they're in good condition.
Step 6: Electrical and Control System Setup
Connect all the electrical components of the cold storage room, including lights, fans, and the refrigeration system controls. Install a control panel that allows you to set the temperature and monitor the operation of the cold room.
Test the electrical system to make sure everything is working correctly. Check for any short circuits or faulty connections. It's also a good idea to install a backup power supply in case of a power outage. This can prevent spoilage of the stored products.
Step 7: Testing and Commissioning
Once the installation is complete, it's time to test the cold storage room. Start the refrigeration system and let it run for a few hours. Monitor the temperature inside the room to make sure it reaches and maintains the desired level.
Check for any leaks in the refrigerant lines or around the panels. Listen for any unusual noises from the compressor or other components. If you notice any issues, troubleshoot them immediately.

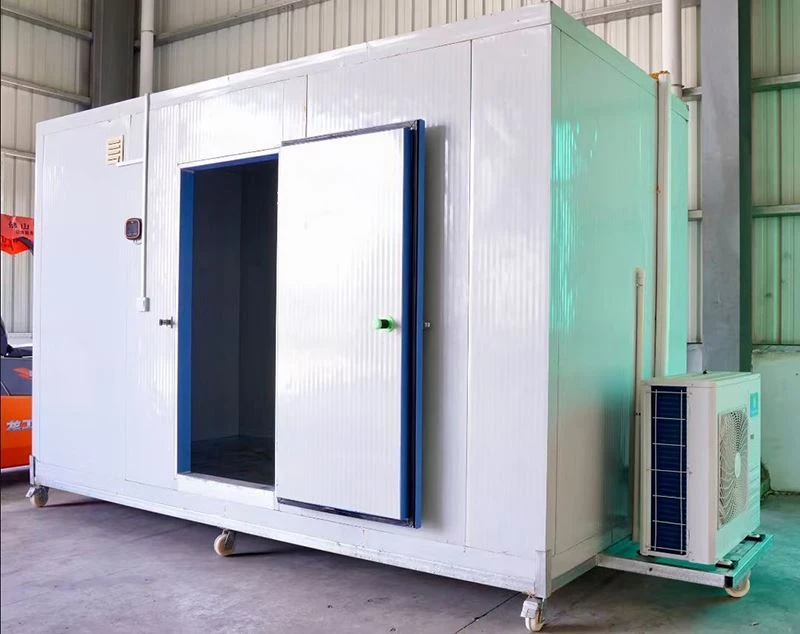
After the testing phase, commission the cold storage room. This means making sure all the systems are working properly and that the room is ready for use. Provide the customer with training on how to operate and maintain the cold storage room.
Step 8: Final Inspection and Handover
Before handing over the cold storage room to the customer, conduct a final inspection. Check all the components one last time to ensure everything is in perfect working order.
Provide the customer with all the necessary documentation, including installation manuals, maintenance guides, and warranty information. Answer any questions they may have about the operation and care of the cold storage room.
If you're in the market for a Commercial Cold Storage Room or a Stainless Steel Electricity Cold Storage Room, we're here to help. Our team of experts can guide you through the entire process, from selection to installation. Don't hesitate to reach out if you have any questions or if you're ready to start your project. We're committed to providing you with the best cold storage solutions.
References
- Industry best practices for cold storage room installation.
- Manufacturer's installation guides for cold storage room components.


